Saturday, January 14, 2012

Welcome


I painted The Cooking Shop, pictured above, about ten years ago when I was contemplating all the various "shops" of my life, a metaphor for the way I spend my time. Of the 13 shops I painted, only this one was always Open. "Open" in this context means that I am always cooking, writing, and blogging, reading cookbooks, sharing dinners with family and friends, eating delicious food at home and while traveling around the world, and much much more. As you can see, my head is popping out of the top of the shop saying "Yum, yum..." The shop is still wide open. And my latest addition to the shop is this blog.

Welcome to Keepers: The Cookbook. It contains the same recipes as my original Keepers: Recipes Worth Keeping and many of my favorite stories. But it is superior in a number of regards. Here are some of the features:

  • All the useful information comes right at the top of this blog: tips on creating the kitchen you want, pantry suggestions, and my favorite cookware, small appliances and tools.
  • It is arranged in cookbook form starting with Appetizers and working through to Dessert.
  • Each recipe is a separate entry. When you scroll down to the very next entry entitled Table of Contents, you will see all of the recipes listed, chapter by chapter. When you click on one, the recipe will be there. No fuss, no muss.
  • You can also click on the Labels to the right to find recipes with a particular ingredient, in a particular chapter (like desserts, for example), or part of an ethnic cuisine (like Persian). As you will see, there are many vegetarian and gluten-free recipes included.
  • The font is large and easy to read.
  • You'll find a lot of suggestions for putting together dinners, with links to the appropriate recipes. And you'll find a number of "How to..." instructions, with the appropriate link.
  • I'm continuing to add more photos to help you "see" what words can't convey.
I want to turn Keepers: The Cookbook into an e-book and perhaps into a bound book in the not-too-distant future. In both cases, I have technology hurdles to over come. But I'm game. Just look at what I've accomplished over the last two and a half years of blogging!  If you're interested in having a copy of one sort or another, please let me know and I’ll add you to the list.

Meanwhile, I am so glad you’re here. Please leave me comments and do let me know if there is anything you spot that needs fixing. I'm pretty good at that too. 


Table of Contents


This Table of Contents, slowly and lovingly constructed, will give you direct access to every recipe in the blog simply by clicking on it below. If you want to find the recipes by ingredients or ethnic cuisines or whatever, you'll need to go to the Labels at the right. Of course you can still casually scroll through the blog, clicking on Older Posts when you reach the bottom of a section.  

You wonder about the chicken? I have a "thing" about chickens. I'm afraid that I will never have any of my own. But my younger son, Ben, has recently acquired four of them. And to my great joy, I was allowed to hold one and talk to her.

Chapter 5 Dal and a Story about Indian Food  
   Chickpeas with Mango Powder 
   Dal with Coconut Milk
   Red and Yellow Lentils                               
   Sesame Chicken and Asparagus Pasta Salad and How to poach chicken breasts
   New Wave Salad with Red Wine Basil Vinaigrette
   Grilled Pancetta-Wrapped Figs and Arugula
       with Mustard Lavender Vinaigrette
   First Night Dinner Salad with Red Wine and Paprika Vinaigrette
   Prosciutto, Pear, and Parmesan Salad with Lemon/Chervil Vinaigrette
   Warm Potato Salad with Garlic Sausage
   Shrimp and Black Rice Salad with Vietnamese Vinaigrette
   Thai-Style Steak Salad with Thai Vinaigrette
Chapter 10 Side Salads and a Story of Lurking Fruits and Veggies 
   Moroccan Two Reds Salad and How to cook beets
   Beet and Yogurt Salad
   Erasto's Coleslaw
   Gujarati Cabbage Slaw
   Caramelized Carrot Salad 
   Couscous Salad with Apricots, Pine Nuts, and Ginger
   Cucumbers with Yogurt and Mint and How to drain soupy yogurt
   Cucumber Salad 
   Fruit Salad with French Fruit Salad Dressing
   Everyday Green Salad with Everyday Salad Dressing
   Iceberg Lettuce with Tangy Blue Cheese Dressing
   Jicama Slaw
   Mango and Hearts of Palm Salad with Lime Vinaigrette
   Orange and Black Olive Salad 
   Avocado-Papaya Salad with Papaya Seed Dressing
   Papaya Salsa
   Parsley, Celery and Herb Salad
   French Potato Salad and How to steam potatoes
   Quinoa Salad with Pistachios and Cranberries with Sherry Vinaigrette
   Roasted Butternut Squash and Spinach Salad with Toasted Almond Dressing
   Grilled Patty Pan Squash with Smoked Bacon and Olive-Caper Vinaigrette
   Summer Squash Salad with Feta
   Tabbouleh Cracked Wheat Salad
   Cherry Tomato, Mozzarella and Corn Salad with Basil
   Ensalada criolla (Creole Salad) with Cuban Vinaigrette

Thursday, January 5, 2012

Creating the Kitchen You Want

Here I am cooking in my kitchen just outside Kyoto, Japan in about 1972. Look for the sauce pan sitting on the cutting board in my post of Essential Cookware below.


I spend a lot of time in my kitchen so I have some thoughts, gathered from nearly 44 years of working in 11 apartment or home kitchens, on what makes for a workable, healthful, and lovable space. From graduate student housing (see my very first blog for a photo) to Taiwan and Japan, from four kitchens in Durham, North Carolina to Berkeley and Sonoma in the present, I’ve put my mark on all of them and have extensively down-to-the-studs renovated two.

I renovated this kitchen in Durham, North Carolina in about 1991. 


Just one thought before I begin: If I think that I need the fanciest, snazziest kitchen around in order to cook good food, I am dead wrong. I can cook good food in almost any kitchen, primitive as it might be. Two propane burners (which always run out mid-cooking of course), cold water, and a counter that was 2 x 2 feet square may not be the ideal cooking space but I was able to cook pretty good Chinese and Japanese food in it. I remind myself that those conditions were a lot nicer than what many folks around the world use daily, squatting over an open fire on a dirt floor or a charcoal-burning brazier on the street. Don’t get me wrong, I love to cook in a nice, well-accessorized kitchen, but it is not necessary.

That said, I want you to have a kitchen you love. If you don’t like it or haven’t made it your own, chances are you will cook less and that would be a pity.

So I’m going to tell you first what I’ve done to improve many of my kitchens and second what I think is important if you are renovating.

I bet some of you, perhaps all of you, have suggestions to add. Please let me know and I’ll update this post in a few weeks. Send me photos too if you have them.

Five Kitchen Improvements

This photo is from the Sonoma kitchen prior to the extensive renovation in 2006. With paint and some imagination, I made this old-fashioned kitchen into a colorful and friendly spot to cook.


Color adds zip to the kitchen. A bright container for my favorite tools. Repainting cabinet doors or the walls in colors I love. Repainting kitchen stools in a smashing color or getting a couple of new bright kitchen rugs.

Good lighting is essential. I replaced florescent tubes with track lighting which brightened everything, including my mood.

This is a photo of my Berkeley kitchen before we repainted the cabinets. Check out the next photo to mark the difference.


Floor mats save your body. I have an iffy back, hips, knees and feet situation. If I stand on any hard surface too long, they start speaking to me. Michelle, my daughter-in-law, pointed me to GelPro kitchen mats which have solved the problem. I put them in front of my chopping and prep space. You can find them at Sign of the Bear in Sonoma and on line.

A big wooden cutting board. Mine is made by Boos and is 15 x 20 inches. I also find thin plastic cutting sheets useful when I’m cutting up raw meat or for transferring chopped items from the board to a pan on the stove.

This is my Berkeley kitchen after we had the cabinets painted and the floors refinished in 2010. It made such a difference.

De-cluttering the counters. I like to keep my counters as clear as possible. It’s an aesthetic thing but it also means that I have more workspace however large or small it may be.

Nine Kitchen Renovation Suggestions

All these photos are from the most recent Sonoma kitchen renovation done in 2006.


An island or peninsula with stools is a great place for friends and family to hang out in the kitchen without getting in my way.

Glass doors on the cabinets which hold plates and dishes are so pretty. I use closed cabinets for food and pots and pans which aren’t so attractive.

Wooden floors are great in the kitchen. In two kitchens I’ve been able to scrape through multiple layers of linoleum to get to the sub-flooring which, in both cases, was a little funky but perfectly usable. With sanding and finishing, the wood adds a nice warmth to the space.

Bookshelves in the kitchen allow me to have my cookbooks readily at hand.


Having my prep/chopping area right next to the stove and large enough to hold my cutting board with some space on either side to spare is essential to me. I don’t like transporting chopped veggies across the kitchen.

Drawers for below the counter storage make it much easier to retrieve what I want.

Well-designed drawer pulls and switch plates are like good accessories to your favorite outfit. They make all the difference.

I chose to purchase more affordable models of appliances this time around. They work very well indeed and kept the renovation expenses a bit more within reason.

A splendid spice rack from the old ironing board cupboard is a great use of space.

Color, good lighting, floor mats, big cutting boards, and clear counter space are just as important in renovating as in improving.

Wednesday, January 4, 2012

Your Basic Pantry

I keep most of these items on hand all the time. When something is close to running out, I buy another. With milk, cheese and eggs in your fridge, there is no telling how many dinners you can put together. Add some sausage, tomato sauce, and pasta or cornmeal and you are set for a good long stretch of time. Add some salad greens—quickly picked up from the closest grocery store or farmers’ market—and you have quick, nutritious and delicious meals available to you, your friends and family whenever speed is of the essence. What would you add to this list?

Cupboard
salt: kosher and any kind you fancy
pepper
dried herbs and spices, I buy as I need them and then refill the bottles from bulk jars
soy sauce
fish sauce (if you do Thai)
Worcestershire sauce
Mirin (sweet Japanese rice wine)
dried pasta, couscous, polenta or cornmeal
rice
nuts and dried fruits
cornstarch
garlic and various dried chiles


Canned or bottled goods
tomatoes
tomato paste in a tube
artichoke hearts
chicken stock
garbanzo beans
tahini
olives like kalamata (I buy pitted)
coconut milk
honey
molasses
peanut butter
jar of pasta sauce
vinegars: balsamic, white & red wine, rice, sherry
olive oil
canola oil

Baking supplies
flour
white sugar
brown sugar
baking powder & soda
vanilla
chocolate
rolled oats

Fridge
cheeses: Parmesan, Swiss, cheddar
eggs
milk
lemons and limes
butter
yogurt
greens of some sort for a salad
green onions
wine


Fridge door
capers
Dijon mustard
ketchup
various Chinese sauces
mayonnaise
anchovies (in a jar)
chutney
maple syrup
sundried tomatoes
bottled horseradish
oils that need to be refrigerated
jams
tahini


Freezer
butter
fresh pasta
frozen peas
frozen chopped spinach
ice cream or sorbet

Essential Cookware

Here are a few of the pots and pans that I use all the time. And I mean all the time. Some are newish, some are quite old and a little beat up. But they are all very useful. Of course, you don't have to have exactly the same thing. If you were to pare the essentials down to bare-bones, you'd need a stock pot, a stew pot, a saucepan, and a frying pan. I've included a couple more items that I love.


Stock pot 
Great for making soups, cooking pasta or steaming veggies.


Sauce pan
I acquired this pan in Japan in 1971. It is my very favorite sauce pan.
Dutch oven or casserole
You don't need this high-end enameled model which we've had forever. A cast iron or regular metal stew pot will work just fine.
Cast iron skillets
Heavy, well-used, seasoned, and indispensable, these pans are used nearly every day.
Large sauté pan
I've gotten rid of my teflon-lined pans, whose coatings were compromised by stirring with metal spoons and by hard use.


Bram
I cook with these wonderful ceramic pots both on the top of the stove and in the oven. On a stove top, they need to have a "simmer mat" under them and need to be kept on a moderate heat to prevent cracks.

I Love/I Hate My Cuisinart


I have been cooking for a lot of people over the last couple of weeks. Four of us on December 23, five on Christmas Eve, nine on Christmas Day, and four on New Years Day. That’s a lot when I’m accustomed to one or two. In preparing these dinners, I used my Cuisinart multiple times. It is a wonderfully helpful machine. I literally couldn’t cook without it. Whirling away--or as my friend Cathleen says “cuising” away (I think it rhymes with wheezing)--I made pomegranate sauce for chicken, blitzed the herbs for the herb kuku, blended butternut squash soup, a spicy tomato sauce for chickpeas, a marinade for fresh crab, and a lovely sauce for the lamb curry. Of course, you can make these items by hand, or with a mortar and pestle, or maybe in a blender, but none of these options works quite as well as the processor.

That said, the Cuisinart has major design flaws. First, the complicated locking mechanism. Early on, someone must have stuck his or her fingers into the spinning blades. Messy and awful for them, I know. But is it really necessary from a safety standpoint to have three components exactly aligned before the C will work? Three. Ridiculous.

Second there is the cleaning issue. There are obscure places which are nearly impossible to wash well: the bottom of the unit which houses the feed tube, the spindle hole underneath the blade, and the inside of the handle. Because it is so hard to clean, I will often organize my cooking so that I only have to rinse it out before moving onto the next task. Maybe dishwashers solve the problem of the hard to reach spots, but I can’t run the dishwasher every time I want a clean processor.

Third, there is the problem with the blade going dull—which it invariably does over time. Did you know that you can sharpen it just as you would any other knife? And you can also buy a new blade from Appliance Sales & Service in San Francisco and get it in the mail. Without replacing the whole unit.

So there you are. I need it. I love it. I wish it were better. Has anyone found a really good one that doesn’t cost a fortune?

My Favorite Kitchen Tools

I use the following kitchen tools all the time whether I’m cooking or baking. In one way or another, I couldn’t cook without them—or at least I couldn’t cook with as much ease and grace as I do. If you are searching for a stocking stuffer or a little something to give to a friend or loved one who cooks, look no further. You can find many of these items at Sur la Table or Bed, Bath, and Beyond, except where noted.

Japanese knives. These are just the best. When I reach in the drawer for a knife, I reach for one of these. They keep their sharpness. In the Bay area, you can find great Japanese knives at The Japanese Woodworker in Alameda, CA or Hida Tool and Hardware in Berkeley.
Microplane grater. Great for grating cheese, ginger, lemon zest. Easy to use. I really like the handle on mine. If you grate a lot, it will grow dull—in which you need to get yourself a new one. You can also use the traditional lemon zester which makes curly zest with more texture.
Pastry cutter. I’ve called for this tool in a number of recipes on this blog, including Apple Crisp, Apple Crumb Pie, Biscuits, and the Breakfast Cake. Probably others as well. Lots easier to clean than the Cuisinart and easier to use than your fingers.
Silicon pastry brush. I use this to paint anything that calls for being painted. Its primary advantage is ease of cleaning. Most pastry brushes have bristles like paint brushes and are the dickens to clean, especially if you’ve been painting with butter or an egg yolk mixture.

Silicon spatula. I love these most when I am trying to get every last drop out of a mixing bowl. They work better than anything else. Period.
Egg beater. Of course you can also use a whip or an electric mixer, but the hand egg beater works really well for whipped cream without the extreme effort of the whip or the noise of the electric version.
Measuring pitcher. This pitcher has the advantage of being able to read the measurement by looking down inside the pitcher itself as opposed to the traditional one which you read from the side. Why didn’t someone think of this sooner?
Potato ricer. I think making really excellent mashed potatoes is both a science and an art. You use the ricer after the potatoes have been properly boiled. The riced potatoes are light and fluffy ready for the warm cream, butter, and salt. No lumps.


Suribachi. This Japanese bowl has a rough surface on the inside and comes with a wooden pestle. The rough surface makes it really easy to make a paste of ginger and garlic, for example. I find it much easier to use than a regular mortar and pestle. You can find them at a store selling Japanese cooking equipment, like Tokyo Fish Market in Berkeley.

Lemon juicer (electric). You may have noticed that I use a lot of lemon/lime/orange juices in my food. I just love the citrusy flavor. This machine makes it so easy to squeeze your juices. Those glass pitcher juicers are hopeless.
Spice/coffee grinder (electric). First off I want to say that I no longer ever use this grinder for coffee. If you want to use yours for both, make sure to clean it out very well between times. There is nothing that grinds up hard spices—like star anise or cinnamon sticks (broken up)—better than this kind of grinder. The one in the photo is over 30 years old but new models abound.

Thursday, November 17, 2011

I Love to Cook

I really do love to cook. The Cooking Shop, hanging on my kitchen wall, is always Open at my house. If there is a stretch when I'm traveling or eating out a lot, I am delighted to get back into my kitchen when I return home. Don’t get me wrong, I love eating food I might not otherwise fix for myself. I love having more time during the day to explore or do projects. I love to have a good conversation over a dinner I haven't had to prepare. And I love to travel. But after some excellent restaurant meals or a wonderful trip, I can't wait to get back into the kitchen. Here are some of the reasons:

Let me be honest here: I love being in control--from deciding what I want to eat that evening, to buying the ingredients and preparing the food. If I’m hungry for pasta, I can choose to fix it.


But I also love the creativity involved in cooking. I love dreaming up a menu where the colors, textures and flavors work well with each other. I love imagining what the plate will look like with the food on it. I love choosing the dinner plate that best sets off the food. I love thinking about the best wine to go with the food.

I love eating good food and cooking for myself is the least expensive way to get it. For a long time when I was much younger, I couldn’t afford to go out to dinner very often and there was no choice but to cook. I figured that as long as I had to cook, I might as well have some fun with it and make it interesting. I still value the economy of cooking at home.

I love using up leftovers in imaginative ways, looking for recipes that use the little bits and pieces of fruits and veggies we all have in our fridges.

I love trying new recipes, cuisines, techniques, and exotic ingredients. Like learning to cook with a pottery bram on the top of the stove. Early on in my cooking history, the part of me that loved learning got engaged and found in cooking a new and endlessly fascinating activity.

I love the challenge of cooking: figuring out the timing and the work flow. When do I need to start the preparation in order to get dinner on the table at 7:00? What is the most efficient and easy way to get the task accomplished? What can be made ahead? How can all the dishes come to the table at the same time?

I also like the challenge of dealing with food preferences, allergies, kids’ likes and dislikes, what’s available in my market and in season, the amount of time and money I have to spend, etc. I have to think really hard when someone can’t eat sugar, wheat, dairy products, eggs, or red meat. Coming up with a great dinner is exhilarating when faced with constraints—and there are always some constraints.

Mindful Cooking at FCCB
I love being in the kitchen, quiet and alone, slicing carrots. Cooking as meditation. It knits me up. Being in the present moment—particularly important when the task involves sharp knives.

Years ago I taught a Meditative Cooking class at First Congregational Church of Berkeley. Fourteen of us gathered in the church kitchen and cooked dinner quietly. Only whispered questions about recipes were allowed. A hush would come over the kitchen. It was really quite marvelous.

I like cooking for small dinner parties and sharing good food with friends and family. I especially love the conversations that happen around a dinner table at home. I think home-cooked food nurtures these conversations.

I loved watching my kids grow up to appreciate home-cooked meals and good food. I must say they didn’t always share my definition of “good” and when they were little would end up eating cereal. But they have grown to be both good cooks and adventurous eaters.

I love eating by myself or with Katherine. I really care about what food I put on my plate and in my mouth. I want my dinners to be interesting, beautiful, colorful, and delicious. Sometimes complicated, sometimes simple. Both just fine.

So that's about it for me. What about you?

Monday, April 4, 2011

CHAPTER 1: Appetizers and a Story of How I Started to Cook

Some folks ask me if I have always loved to cook. The answer is a resounding no. As a young girl, I once made a disastrous chocolate cake with my cousins, but other than the occasional banana salad, I was neither interested nor particularly welcome in my mother’s kitchen. I did set the table.

My mother cooked serviceable dinners, pretty much the same conventional fare every week. Well-cooked pork chops, hamburger patties, french fries and green beans from the freezer, a salad, and ice cream. She had some specialties, like Beef Stroganoff, which were reserved for company. And on Sundays after church we would occasionally have a wonderful pot roast with carrots and potatoes or chicken and dumplings, both of which I adored. But mostly it was plain and simple mid-western food. And I took no part in preparing it.

So what happened?

• A move to Berkeley, California in 1966. Newly married to a graduate student at the University of California at Berkeley, I moved from northwestern Ohio to the Bay area just in time for the action. Which for me included food as well as anti-war and anti-establishment. Here I am in my Albany, California kitchen, butterflying shrimp for a Japanese dish I was attempting. Not particularly successful if I remember correctly.

• The Shattuck Avenue Coop at the corner of Shattuck and Cedar, where Andronico’s currently resides, was a place of wonder for this mid-western lass. Full of exotic fruits and vegetables and people, the store offered a dazzling assortment of food products and wines from around the world. I studiously picked up all the free printed recipes and bought the Coop Lowcost Cookbook, to supplement the Better Homes and Gardens Cookbook I had received as a wedding present.

• Our friends Nick and Sarah were passionate and adventurous cooks and eaters. He was a Scot and cooked up “scurlly,” an oatmeal and onion combination, which we washed down with wine or Green Death, so called because of its green can and lethal effect.

• Cookbooks started showing up under the Christmas tree and in birthday boxes. Mastering the Art of French Cooking was first and was quickly followed by Craig Claiborne’s New York Times Cookbook and New York Times Menus Cookbook.

• Gardening and food columns in the Good Times, an alternative East Bay newspaper in the 60s. Jeanie Darlington wrote about gardening in Grow Your Own. Marrakesh Lil, among others, wrote a great food column whose recipes I held onto for years. I lost them about 19 years ago but just recently my former husband found them and sent them to me.

• Occasional dinners out at places in San Francisco and Berkeley, such as The Pot Luck on San Pablo Avenue, opened my eyes to the amazing combinations of flavors and exotic ingredients you could put in your mouth. “Blew my mind” as we would say.

• A chance to grow and eat really fresh produce came about as an indirect result of the People’s Park controversy in 1969. The university turned a field at the corner of Buchanan and Jackson into garden plots and offered them to residents of Albany Village where we were living. We signed up. Oh my god, fresh green beans, basil for pesto, and tomatoes.

• I was cooking all the time. Nearly every day. Hard to imagine now, isn’t it? Learning so much. Gazpacho from Craig. Salmon cheeks and Finnan Haddie from Spengers Fish Store, chuck roasts from the Coop, and fresh crab for special occasions.

I was really lucky to have such a perfect coming together of supportive elements: cookbooks, friends and a husband who liked to cook and eat, a good grocery store, and time. I made a whole bunch of mistakes. As I said to myself about the Japanese dish above, "Oh well, I never claimed to be perfect. And there are lots more dinners ahead of me." It's still the case.

Apricot Thrones


25 pecan halves
2 ounces cream cheese at room temperature
2 ounces blue cheese
25 dried apricots

1. Preheat the oven or toaster oven to 325ºF. Place the pecans on a baking sheet and toast in the oven until golden brown. Watch carefully. Let them cool.
2. Combine the cheeses and stir until evenly mixed. If the mixture doesn’t get smooth, microwave for 10 seconds to soften slightly and stir again.
3. Scoop up small amount of the cheese mixture and place on top of each apricot. Start with a small amount. You can always add more later.
Note: You can use a pastry bag if you are doing a large number of these.
4. Top with a toasted pecan, rounded side up, if you are fussy about it. Transfer the apricots to a serving plate, cover with plastic wrap, and refrigerate.
Note: The recipe can be completed to this point up to 8 hours before serving.
5. Serve at room temperature.

6-10 servings
Adapted from Hugh Carpenter and Teri Sandison’s Fast Appetizers

Carrot Purée with Caraway and Feta


1¾ pound carrots, peeled
4 tablespoons olive oil, plus extra for drizzling
Salt and pepper
1 tablespoon caraway seeds, roughly ground in a mortar, optional
Note: I haven’t used these because the carrots by themselves are so good. Of course, this presumes really tasty carrots.
¼-½ cup feta cheese, crumbled, for garnish
2 tablespoons chiffonade of mint, for garnish, see instructions for basil
5 rounds of pita bread or squares of lahvash

1. Slice the carrots into ¾-inch rounds, toss with half the olive oil and some salt and pepper, and place on a rimmed baking sheet. Cover with foil and roast at 400ºF for about 30 minutes or until they are completely tender. Remove the foil and cook uncovered for about 15 minutes or until they are golden.
2. Cool a little before puréeing in a food processor or mashing by hand. Transfer to a bowl, stir in the optional caraway, the remaining olive oil, and salt and pepper to taste. If the purée is too thick to spread, thin it out with a little water.
3. To serve, put the purée in a shallow bowl, crumble the feta on top, drizzle with a little olive oil, and sprinkle with the mint.
4. Serve with toasted pita bread which you make by cutting each circle into 8 pieces (or the lahvash cut in 3-inch squares), arranging them on a baking sheet and toasting under the broil for 2-3 minutes. Watch carefully. They burn in a flash, especially if guests arrive as they are toasting. For your gluten-free guests, you can have rice or lentil crackers on hand or vegetables for dipping.

6-8 servings as an appetizer
Adapted from Sam and Sam Clark’s Casa Moro

Curried Carrot Dip


1 pound carrots, peeled and cut into ½ -inch pieces
¼ cup sunflower seeds, lightly toasted
2 teaspoons olive oil
½ teaspoon minced garlic
1 teaspoon curry powder
½ teaspoon ground cumin
¼ teaspoon salt or to taste
1 tablespoon fresh lemon juice

1. Place the carrots in a pot of salted water and bring it to a boil. Cook for 7 to 10 minutes or until soft. Drain and let cool.
2. Place the sunflower seeds in a blender or food processor and process into crumbs. Add the carrots and all the remaining ingredients and blend until smooth, scraping down the sides of the processor as needed.
3. Taste for salt and adjust the spices and lemon juice. Transfer to a covered container and refrigerate until ready to use.

Serve with crackers, toasted naan (Indian bread) or fresh veggies.

Makes 2 cups
Adapted from Isa Chandra Moskowitz and Terry Hope Romero’s Veganomicon: The Ultimate Vegan Cookbook

Cauliflower, Caper and Pumpkin Seed Spread


8 ounces cauliflower, broken or cut into florets
¼ cup shelled raw pumpkin seeds
1 clove of garlic, coarsely chopped
2 green onions
¼ cup olive oil
1 tablespoon capers in brine + a little of the brine for seasoning
Salt and pepper to taste

1. Bring two cups of water to a boil in a small saucepan. Add the cauliflower and cook until tender, about 5 minutes. Scoop out the cauliflower. Leave the water boiling. Rinse the cauliflower in cold water to stop it cooking. Drain and set aside to cool.
2. Dunk one of the green onions into the boiling water for 15 seconds. Remove, drain and coarsely chop along with the uncooked green onion.
3. In a food processor purée the pumpkin seeds until they become a fine meal. Add the garlic and whirl until it mixes well with the pumpkin seeds.
4. Add the green onions and drained cauliflower to the food processor. Process while slowly adding the olive oil, capers, brine, salt, and pepper. When the mixture is thick and well combined, it’s ready.

Serve with rice crackers, rye toast, toasted pita, herb slab, ciabatta or cucumber slices.

6 servings as a dip before dinner
Adapted from Marlena Spieler’s column in the San Francisco Chronicle

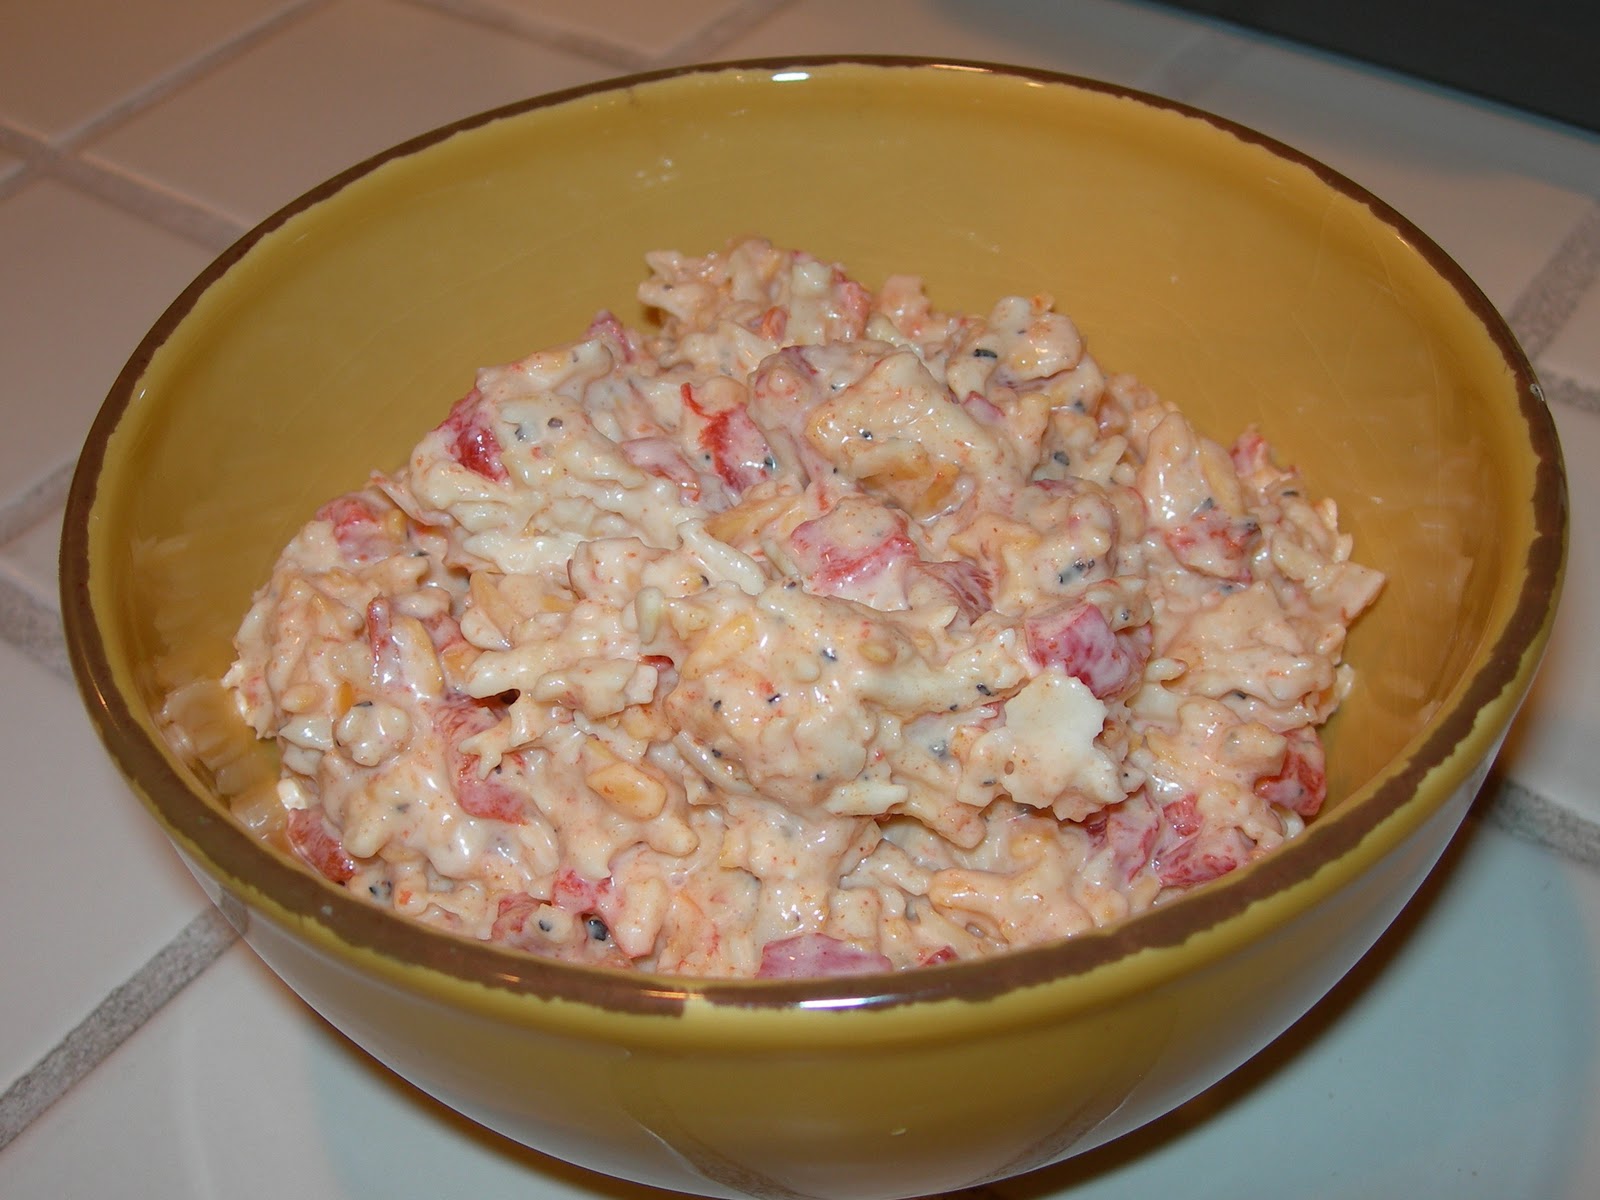
Foster’s Pimiento Cheese Spread

Katherine’s mother who lives in Roanoke, Virginia always has a deli tub of this spread awaiting us in the fridge. The one she buys at her favorite place is really good. This one is even better.


1 cup (4 ounces) grated sharp Cheddar cheese
Note: You can grate the cheeses in a food processor if you wish.
1½ cups (6 ounces) grated Parmesan cheese
1 cup (4 ounces) grated smoked or regular Gouda cheese
2 roasted red bell peppers, peeled, cored, seeded, and chopped, see instructions below
1 cup mayonnaise
1 jalapeno, red is preferable but green is OK too, seeded and minced
1 tablespoon cider vinegar
1 tablespoon honey
½ teaspoon smoky sweet or regular paprika
1 teaspoon salt
1 teaspoon pepper

1. Mix together the cheeses and the roasted peppers in a large bowl.
2. Combine the mayonnaise, jalapeno, vinegar, honey, paprika, salt and pepper in a small bowl and stir to blend well.
3. Stir the mayonnaise mixture into the cheese mixture and mix well. Taste for salt, adding more if necessary. Refrigerate in an airtight container until ready to use or up to 1 week.

There are lots of uses: on crackers, toasted bread, biscuits, English muffins, or chips; as a sandwich spread, a topping for baked potatoes, or an omelet filling. Great for breakfast, lunch, or a pre-dinner snack.

Makes about 4 cups
Adapted from Sara Foster’s The Foster’s Market Cookbook

How to roast red bell peppers and poblanos

1. Place the peppers on a shallow rimmed pan lined with aluminum foil. If you don't line it with foil, you'll have a nasty clean-up job afterwards. (See below)

2. Place the pan under the broiler on the second shelf down from the top of the oven. Keep turning the peppers until they are blackened on all sides. Remove from the oven.

3. Place them in a bowl and cover. Sometimes I skip this step and peel them while they are still hot, when the skin is still slightly puffed up away from the flesh.

4. When they are cool enough to handle, remove all the blackened skin.

5.  Pull the skinned pepper apart and remove the stem, seeds, and white membranes.  Refrain, if you can, from rinsing under water. I save the liquid the peppers release to use in any situation calling for stock.